Powerdynamo brings new ignition & light
to your vintage motorcycle
![]()
![]()
![]()
![]()
|
|
Powerdynamo brings new ignition & light |
|
|||
|
|
|||||
|---|---|---|---|---|---|
| Assembly instruction for system 70 15 799 00 |
Version 10.11.2008 |
|
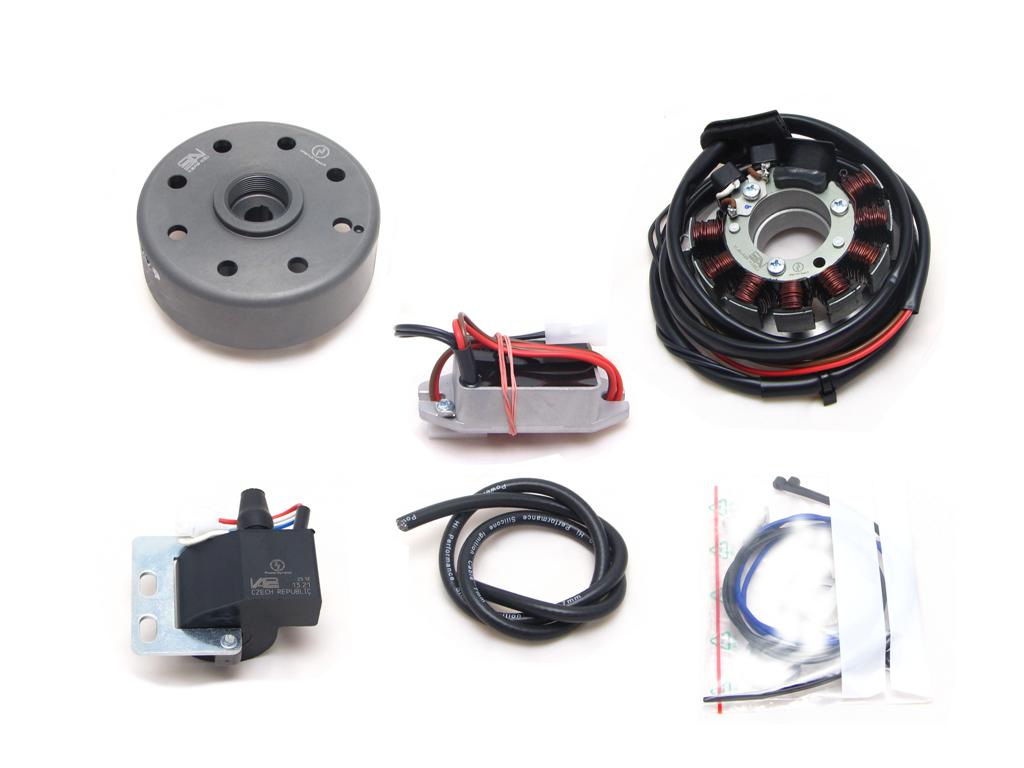
You should have received those parts:
|
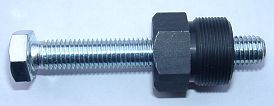 |
To disengage your new rotor again, you will need a
puller M27x1,25 (part 99 99 799 00 -Not provided!-).
Note: Never use a claw puller, a hammer or any other device, that will shake the magnets off. |
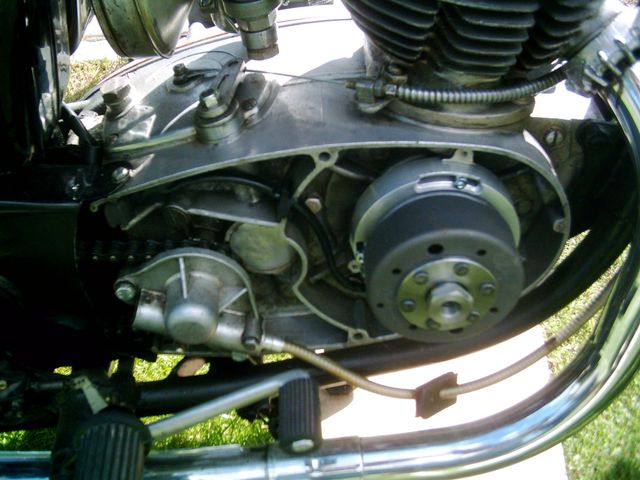
| Make sure your motorcycle rests securely, preferably on an elevated work bench and that you have good access to the dynamo side of the engine. | |
|
|
|
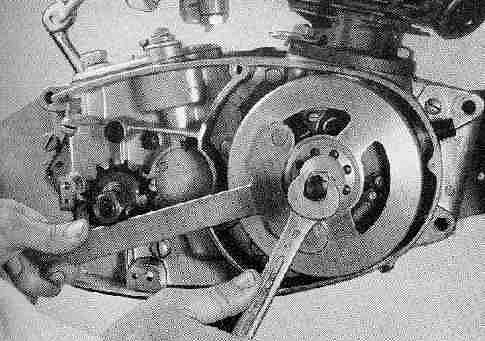 |
Disconnect all wires to the old dynamo and take
those parts off.
Take the woodruff key from the crank pin. It will not be needed any more and prevent assembly. If you forget this right at start, you will have to take the whole new unit off again to get access to the key. |
|
|
|
 |
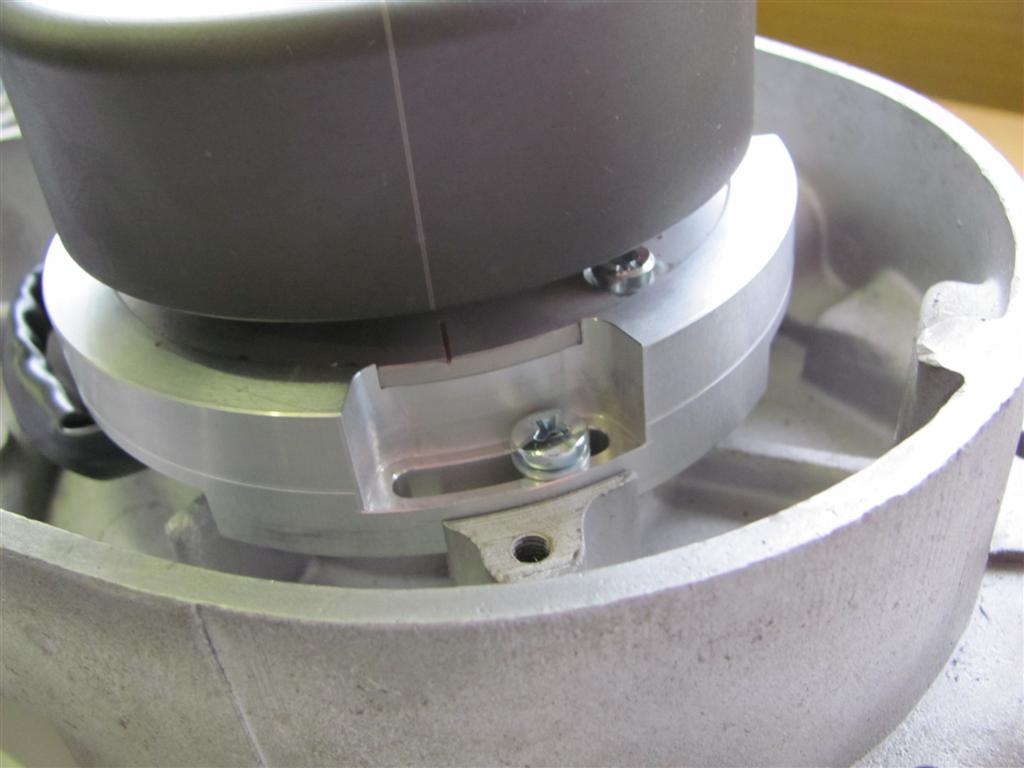
Take a look at the new stator unit. You will find at
the adapter plate, left of the black coil, an ignition marking. Don't remove the stator off the ground plate, it's needlessly and you're only in risk to damage the coils and the cables below. |
|
|
|
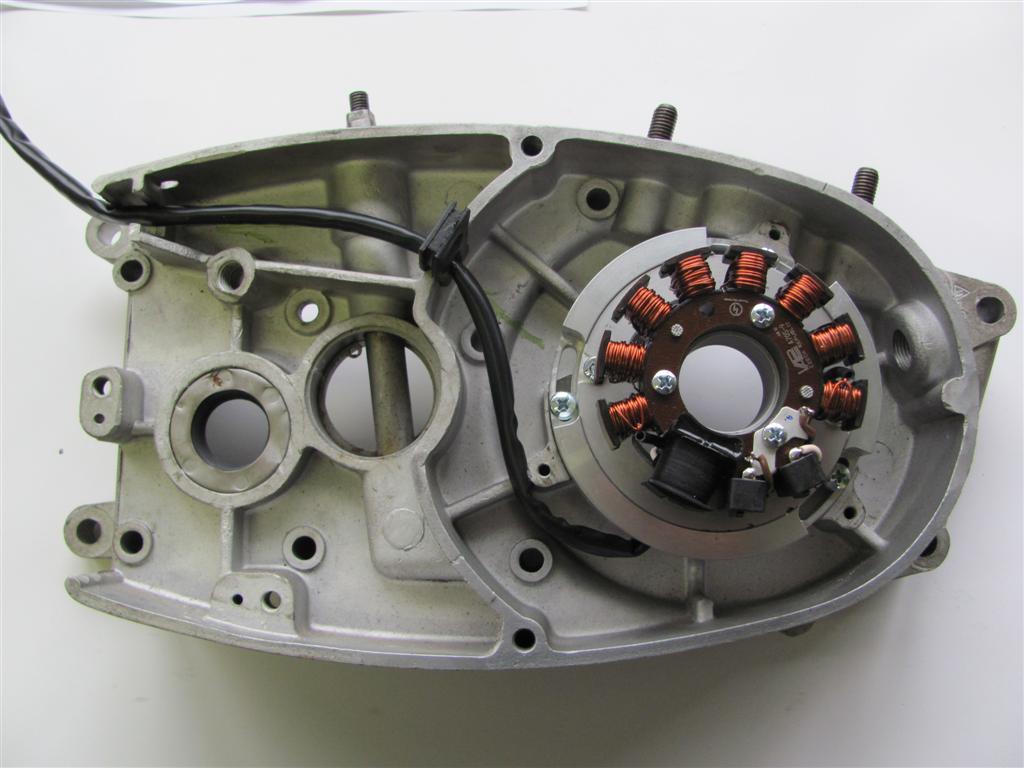 |
Put the preassembled stator unit onto the motor case.
The thick black coil shows at 7 o'clock. Screw down the unit with
the 3 screws M5.
Attention: There is no reason to remove the stator from its mounting plate. But if you do remove it, please insure that it reinstalled correctly. Since the ignition timing would be 120° off if the stator were installed incorrectly. Put the stator coil back onto the plate, take care not the damage the wires. The stator has to snap in rather sharply. If it sets soft, you have probably squeezed a wire underneath! |
| Make sure that the inner opening of the stator unit slots evenly over the elevated fixing rim of the base plate - otherwise the coil will sit lopsided and will touch the rotor, damaging it. | |
|
|
|
| Take the spark plug out and bring the piston into ignition position (put the rotor loosely onto the crank shaft and using it as a turning knob). | |
 |
Then remove the rotor from the shaft and put the rotor
carefully back on the crank shaft (without changing its
ignition position) in such a way, that the marking on the rotor align
with the marking on the adapter plate.
It is very important during that procedure, not to alter the crank's ignition position, otherwise you have to redo all. |
|
|
|
 |
Screw down the rotor with the mounting nut.
To disengage your new rotor again, you will need a puller M27x1,25 (part 99 99 799 00). With that are the workings at the motor finished. Screw in the spark plug again. |
|
|